Tempo Timesheet integration
Use Tempo Timesheet Account values inside Jira issue templates. Generate the API token, configure the app, and pick accounts at create time.
Why integrate with Tempo
If your organization uses Tempo Timesheet to track time and bill clients, the Account custom field on each Jira issue drives where that time is allocated. For billable teams, an incorrect Account on a ticket means an incorrect invoice. Templating the Account field eliminates that risk by setting the right value the moment the ticket is created.
Issue Templates supports Tempo Accounts natively, with no third-party glue.
Step 1: Generate a Tempo API token
The integration is authenticated with a Tempo API token tied to your Tempo workspace.
Open Tempo settings
In Jira, open Tempo in the left sidebar. From Tempo, pick Settings.
Scroll to Data Access and open API Integration
In the Tempo settings page, scroll to the Data Access section and pick API Integration.
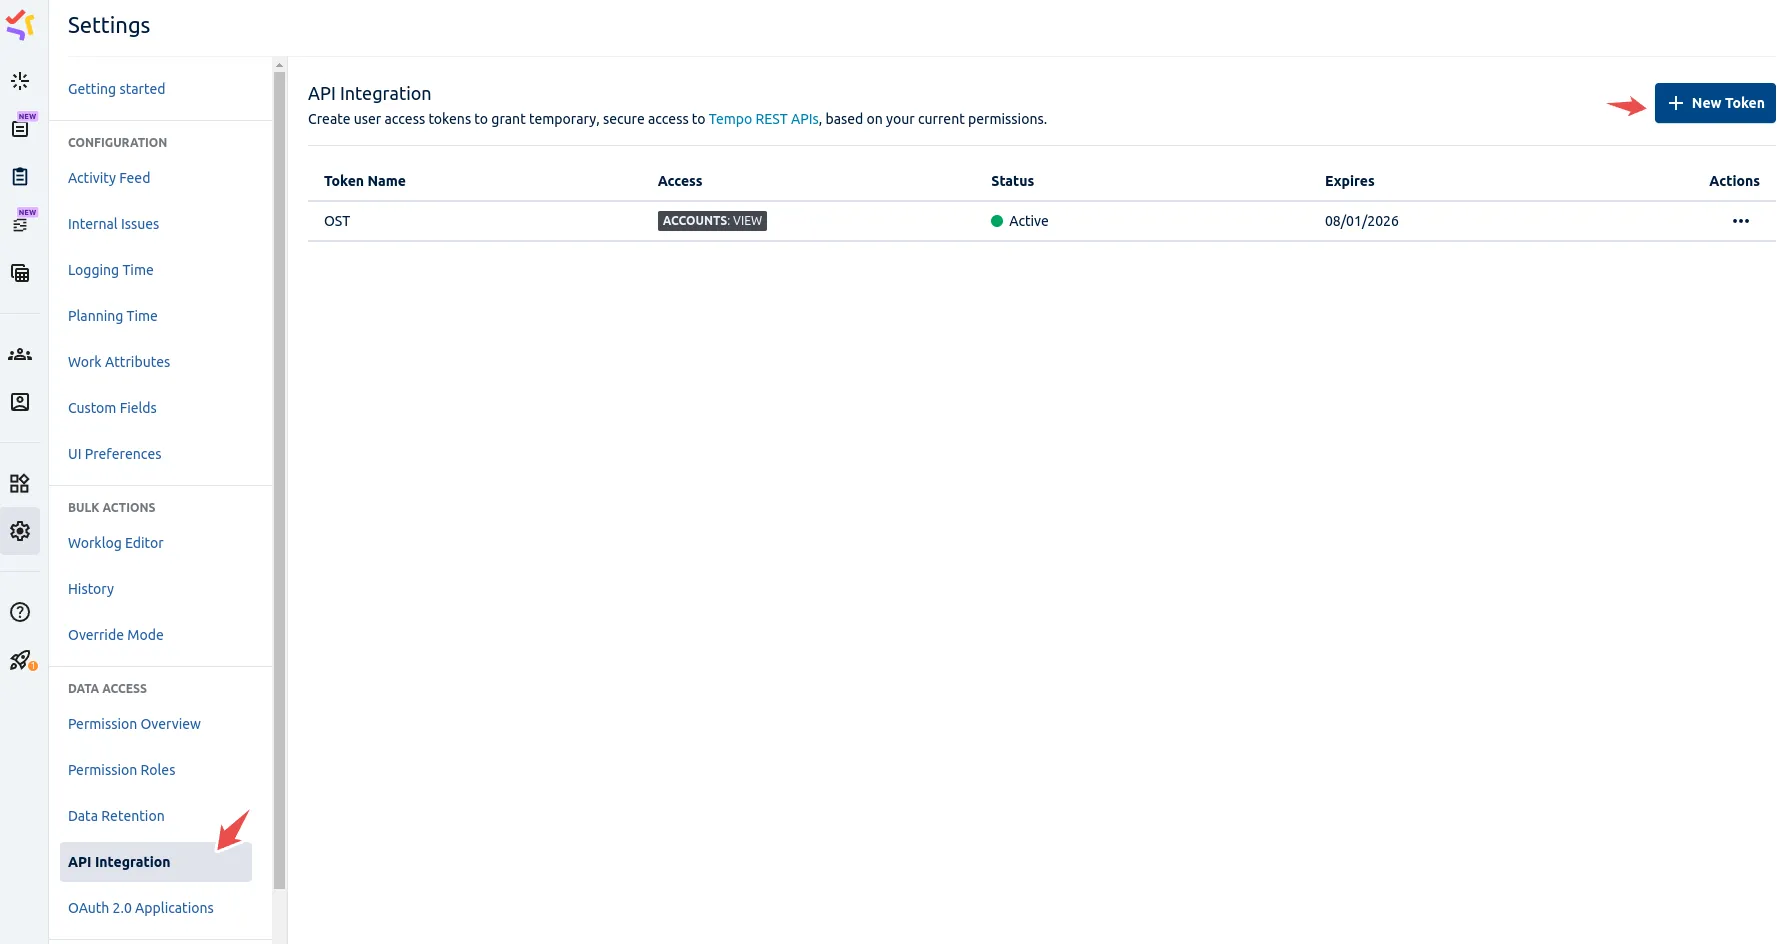 The Data Access section in Tempo settings, where API Integration lives.
Generate and copy the token
Click the button to generate a new API token. Copy it immediately; Tempo only shows the full token once. If you lose it, generate a fresh one.
 Generate the Tempo API token, then copy it before leaving the screen.
Keep the token in a secret manager. Anyone with the token can read Tempo Account data for your workspace.
Step 2: Configure the integration in Issue Templates
Open the app’s Integrations screen
In Jira, pick Apps → Manage your apps. In the sidebar, pick Issue Templates for Jira Cloud. Click Integrations in the app’s settings menu.
Paste the Tempo API token
Find the Tempo API Key field and paste the token. Click Save. The app validates the token by calling Tempo’s authentication endpoint; you will see a success or failure indicator within a few seconds.
 The Integrations screen in Issue Templates, where you paste the Tempo API Key.
Step 3: Add a Tempo Account variable to a template
Open an existing template (or create a new one) in the advanced editor
Templates need to be in advanced mode to expose Tempo as a variable type.
Create a variable bound to the Account field
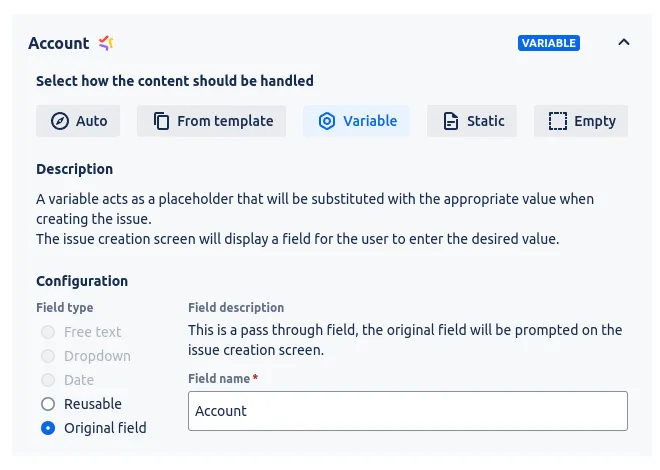
In the editor, pick the Tempo Account field. Switch its mode to Variable. The dropdown of allowed values is populated from your Tempo workspace via the API token you saved in step 2.
 The Tempo Account field set to Variable mode in the advanced template editor.
Save the template
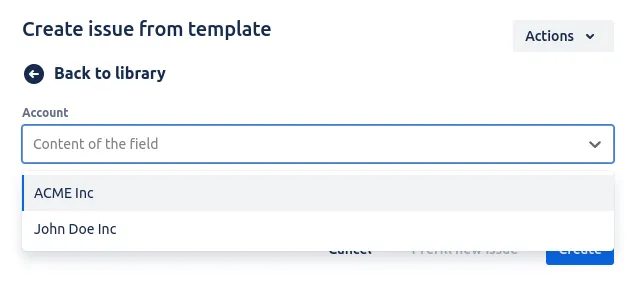
The next time a user launches the template, the Tempo Account variable will appear in the create form as a dropdown listing the accounts they have permission to bill against. Their pick is applied to the new Jira issue and Tempo allocates time correctly from the first hour logged.
Troubleshooting
- The Tempo Account dropdown is empty. Check that the API token is still valid (Tempo tokens can be revoked or expire). Regenerate if needed and re-paste into the Issue Templates Integrations screen.
- A specific account is missing from the dropdown. Tempo permissions are evaluated per user. The signed-in user must have permission to bill to the missing account; check the account’s access list in Tempo.
- The integration was working and stopped. A Tempo admin may have rotated or revoked the API token. Re-run step 1, generate a fresh token, and update Issue Templates.
If trouble persists, open a ticket on the support portal. Include the timestamp of the failure and any error message from the app’s Integrations screen; that usually points us at the root cause within an hour.
Related guides
- Creating variables in templates explains the variable types that the Tempo Account field plugs into.
- Prefilling the issue creation screen shows how template values, including the Account, land on the create form.
- Other integrations covers the third-party connections Issue Templates supports alongside Tempo.
- Advanced usage goes deeper on the advanced editor where Tempo variables are configured.
Ready to template your Jira?
Install Issue Templates for Jira Cloud on the Atlassian Marketplace. Free up to 10 users.