How to create issue templates in Jira
Introduction
Welcome to this user guide. We'll walk you through the features of our Issue Templates for Jira Cloud extension.
Issue Templates for Jira Cloud is a 3rd-party extension ("app") that we have specifically developed to address the need of providing templates inside your favorite Atlassian product.
Our goal is to help you reduce redundant tasks and save time when dealing with Jira issues in your daily workflows.
What is a Jira issue template?
It's important to note that any issue you create using a template from our extension becomes a genuine Jira Issue. This means that if you ever decide to stop using Issue Templates for Jira Cloud, your Jira projects remain unaffected and continue to function as usual.
Template variables

How to create a variable
You can insert variables in various parts of your Issues, such as the Summary, Description, Epic name, custom fields, and more.
Defining a variable
A variable is represented by its name enclosed between two sets of double angle brackets. For example: <<Variable Name>>
Adding multiple variables:
There's no limit to how many variables you can include in a single Issue.
Reusable variables
Imagine you're creating a template for an HR Onboarding process in Jira.
This process might involve a main Story with several associated Sub-Tasks.
Within these issues, you may find yourself repeating certain values, such as the new employee's First Name, Last Name, or Department.
To streamline this process, you wouldn't want to ask the user to enter the same information multiple times. That's where our "Reusable variables" feature comes into play.
How to create an issue template for Jira?
Key features
- Turn any Jira issue into a template.
- Use variables in your content to make a static issue into a dynamic and reusable template.
- Easily recreate complex hierarchies of Epics or Subtasks with just one click.
- Reuse variable content in child issues.
- Empower your team members to create an issue from a template effortlessly.
- Prefill the issue creation screen with preset content.
- Custom fields are supported.
- JQL searches are also supported
Step by step walkthrough
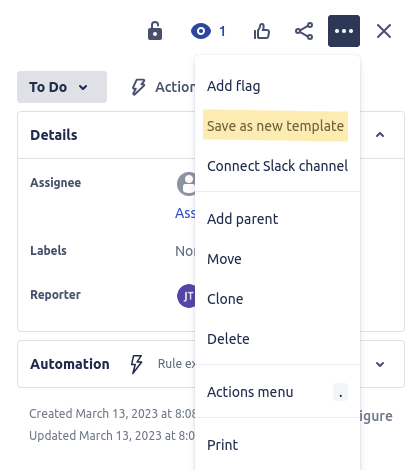
- Begin by either creating a new issue or navigating to an existing issue you'd like to turn into a template.
- On the right side of the screen, click on the three-dots icon. From the drop-down menu, select Save as new template.
- The first screen loading is a simple, easy way to create a template from a Jira issue without entering into the details. Basic but most commonly presets will be used.
Select what fields to persist in your tempate and hit Save template.
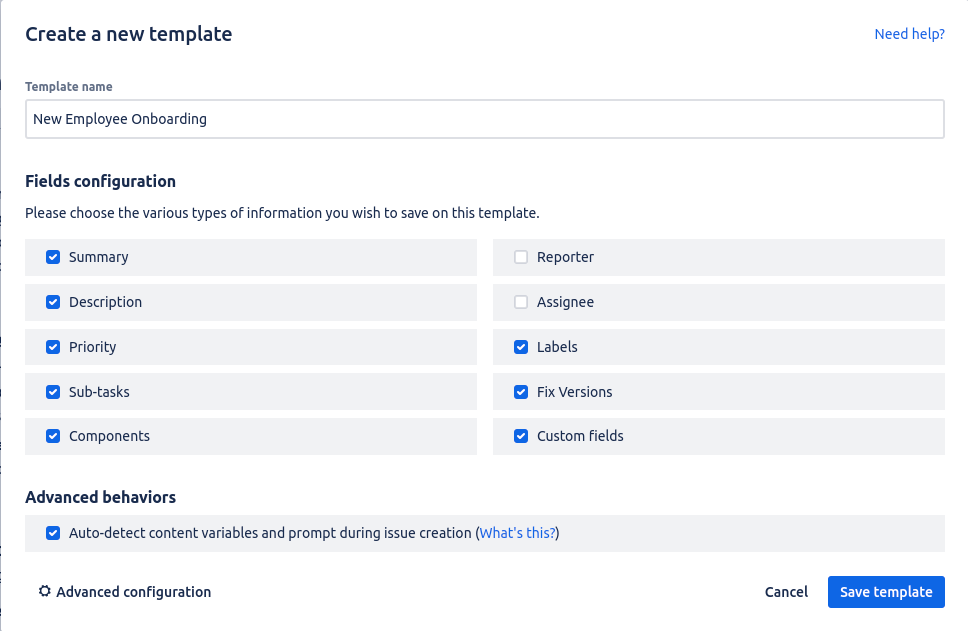
- If however you need to fine-tune the details of your template, select Advanced configuration at the bottom-left of the screen.
Once the advanced template configuration screen loads, you'll notice different sections corresponding to various Jira fields, such as Summary, Description, Reporter, etc. Each field's behavior can be configured individually. For instance, one field might draw its value from the template, while another prompts the user during issue creation.
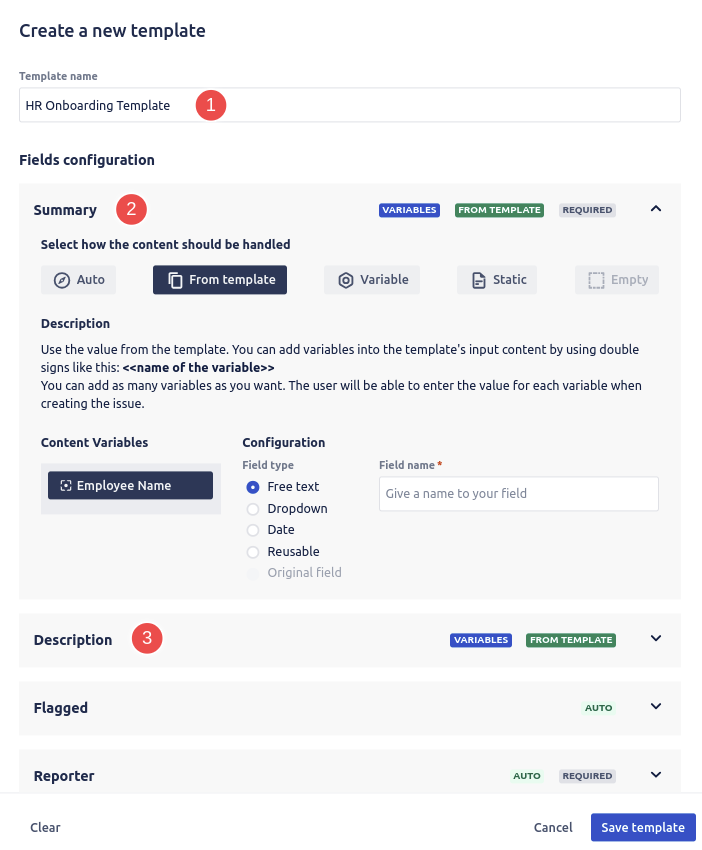
This name will be displayed in the issue creation screen.
Before you delve into the specifics of the template's contents, it's essential to determine the type of field you're working with. This helps ensure consistency and proper behavior during the issue creation process.
- Auto
By default, this setting allows Jira to manage the field. Our extension won't input any value into it unless it's marked as required. If it's a mandatory field, users will be prompted during the issue creation process. - From Template
The field will automatically draw its content from the associated template value. This applies to all types of content, be it text, date, URL, checkbox, etc. If your template contains variables, their configuration will appear here. (For more on variable configuration, see below.) - Variable
This setting transforms the template field content based on user input. You can set the input format as Text, Date, Dropdown, Original Issue, or Reusable. Important to note: when a field is set as a variable, it becomes a mandatory field during issue creation. (For more on variable configuration, see below.) - Static
Setting a field as static means you select once and for all its content and won't prompt the user for input during issue creation. - Empty
Different from "Auto", this setting ensures the field remains blank. This is only possible if the Jira field isn't mandatory.
Click to expand its configuration
Variable configuration
You will find below the different formats available and their preview in the issue creation screen.
- Free text
A straightforward text input field.

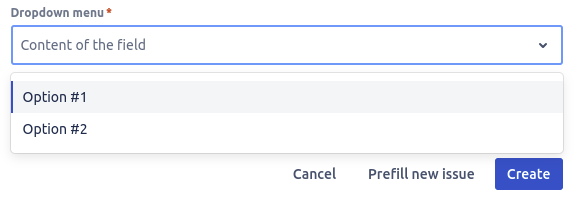
- Dropdown
Presents a list of predefined options in a dropdown menu.
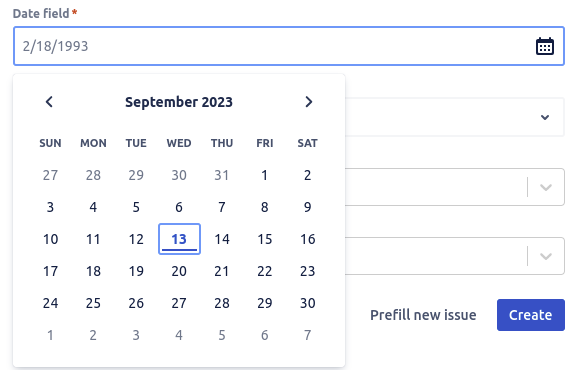
- Date
Features a date picker for users to select a specific date.
- Reusable
An innovative variable type that sources its input from another variable present on the screen.
This is particularly beneficial when you intend to replicate the content from one field to another, ensuring consistency. - Original Field
A passthrough variable that showcases the original field input from the source issue during the issue creation process.
How to create an issue from a template?
We provide an easy way to create an issue (also known as a ticket) from a template:
- From the Apps menu
- From the dashboard (if the template widget has been added)
It's super simple!
- Start by logging into your Jira account and accessing your dashboard or any other Jira page.
- Look for the Apps option in the main menu or toolbar, typically found at the top or side of your screen.
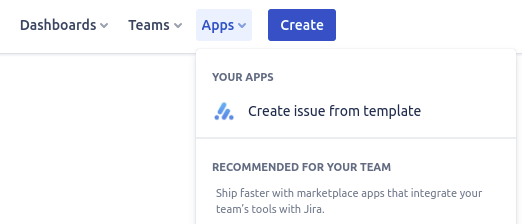
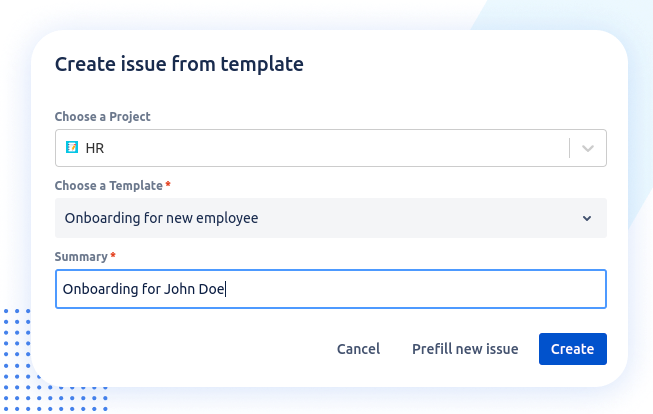
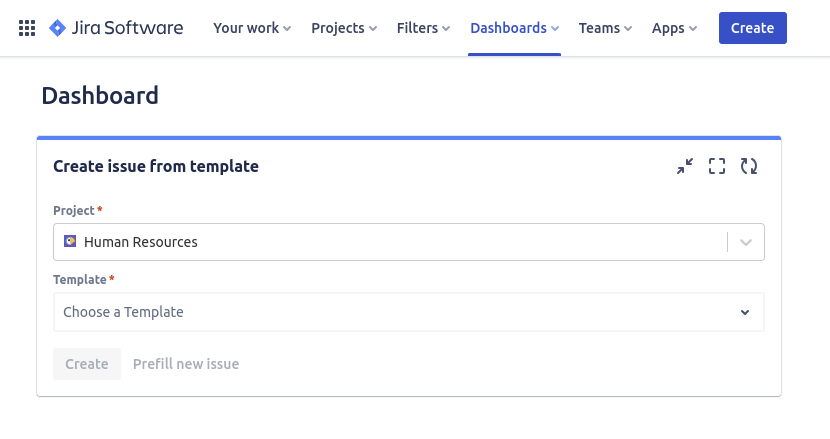
- From the expanded menu, choose the Create issue from template option.
- Follow the instructions and fill the fields.
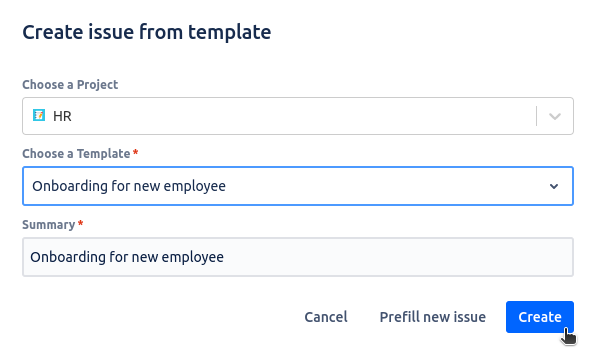
- Click on the Create button to instantly create the issue from the selected template, or choose Prefill new issue to prepopulate the standard Jira issue creation screen with the values found in the template.
Using the Dashboard Gadget
- Start by logging into your Jira account and accessing your dashboard.
- On the upper right corner of the screen, click on the Edit button to start configuring your dashboard.
- You will see, on the right of the screen, a new panel opening with a list of available gadgets to use. Search for Template.
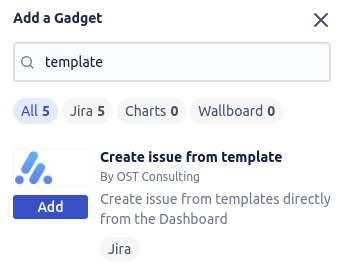
- Click on the Add button to place it on your dashboard.
How to manage created templates?
Templates are accessible from the configuration screens of Jira Apps.
Configuration screens
- On the menu, hit the Apps dropdown menu and look for Manage apps item.
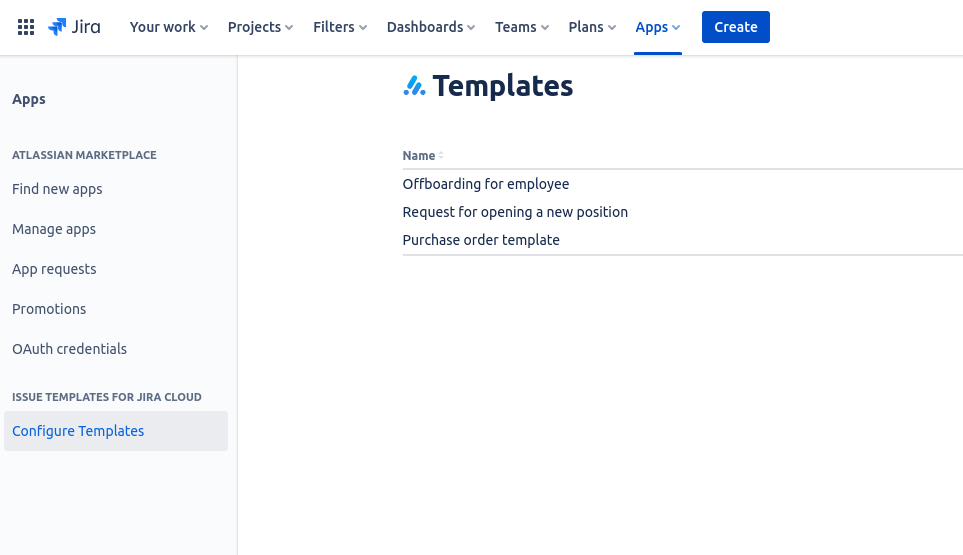
- Once you reach the page, you’ll find on the left menu pane a section about Issue Templates for Jira Cloud
- Click on Configure Templates
Searching with JQL
Any issue that you create using our Jira add-on is seamlessly integrated into the Jira ecosystem. This means that these issues can be effortlessly located and searched using the standard Jira Query Language (JQL).
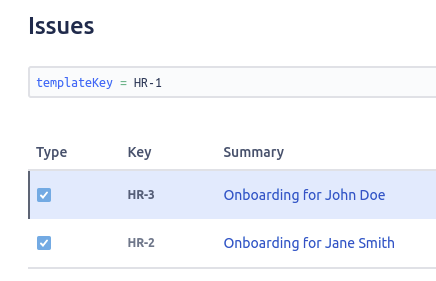
- Go to your Jira issue list page.
- Use the field named templateKey in your JQL search to look for issues created from a particular template.
- Done!
How to set permissions?
You can restrict the usage and management of templates to only some Jira user groups.
Restrict who can use this app
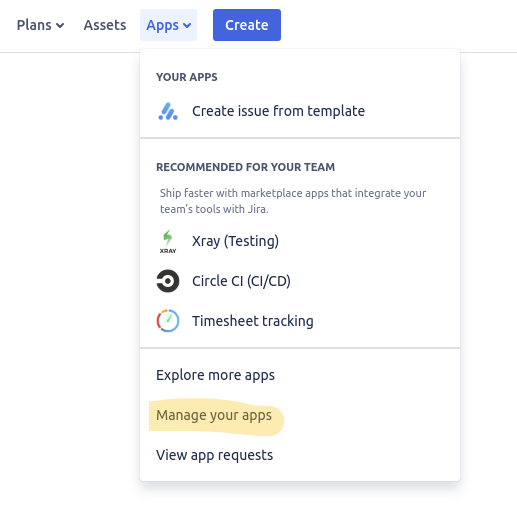
- On the menu, hit the Apps dropdown menu and look for Manage your apps item.
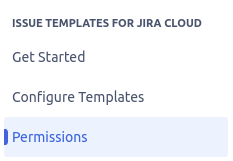
- Once you reach the page, you’ll find on the left menu pane a section about Issue Templates for Jira Cloud
- Click on Permisions
- You will then be presented a screen where you will be able to select which groups to assign to use templates and/or to manage them.
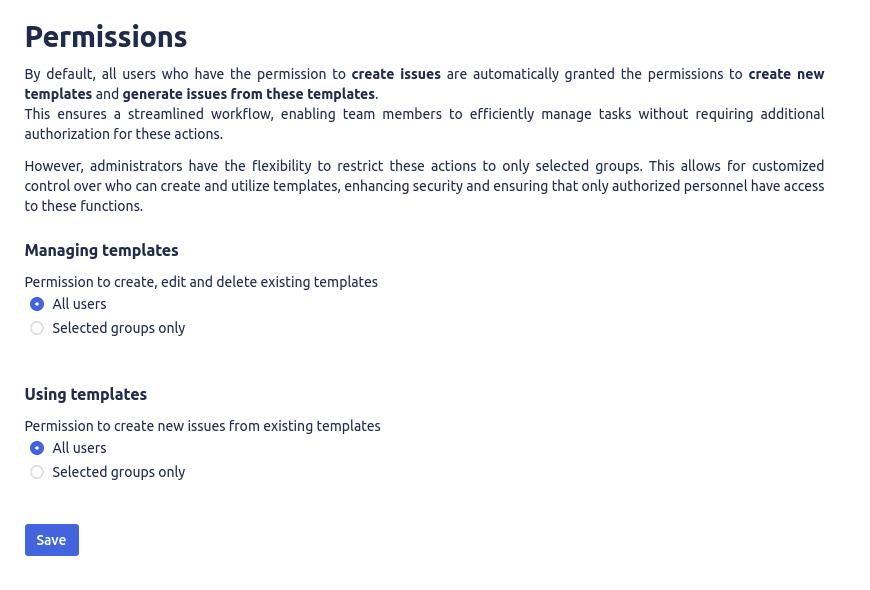
.png)
We provide an easy-to-use Atlassian Jira extension that simplifies template creation and daily use.